Lightroom Redux
Moving from the catalog to the cloud
November 12, 2020 • 7 Minute Read ∞
I’ve been using Adobe Lightroom since it was launched in 2007 (there was a short stint with Aperture, but let’s pretend that application never existed). A decade later Adobe announced that they were renaming the product “Adobe Photoshop Lightroom Classic CC”, and that’s when I knew that it was over. Adobe Lightroom CC was the future, and at some point, I would have to switch or find a new library manager. Today they are called Lightroom and Lightroom Classic (LrC).
Let me put this up front: I am not a professional photographer. I shoot what I like, when I like. But even a casual shooter will take 200 plus frames in a session, and those have to end up somewhere, especially when they’re 24 megapixel DNGs. This guide is meant for a photographer like me: that shoots mainly personal and family photos and needs to move over because the writing is on the wall. If you deal in catalog files for client management purposes, you have no choice but to stick with Classic, and hope whatever Adobe product manager that owns it doesn’t wake up one morning and decide to kill it.
I first experienced Lightroom CC on an iPad Pro in 2018, and technically, it was wildly impressive. Realtime RAW editing, asynchronous loading while scrolling at 60 fps, it was almost worth switching to the cloud infrastructure right then and there. But it had major failings. No way to recover deleted photos, no presets, no way to duplicate, scant methods of categorization. But over the next two years, those features caught up. It was time to make the jump.
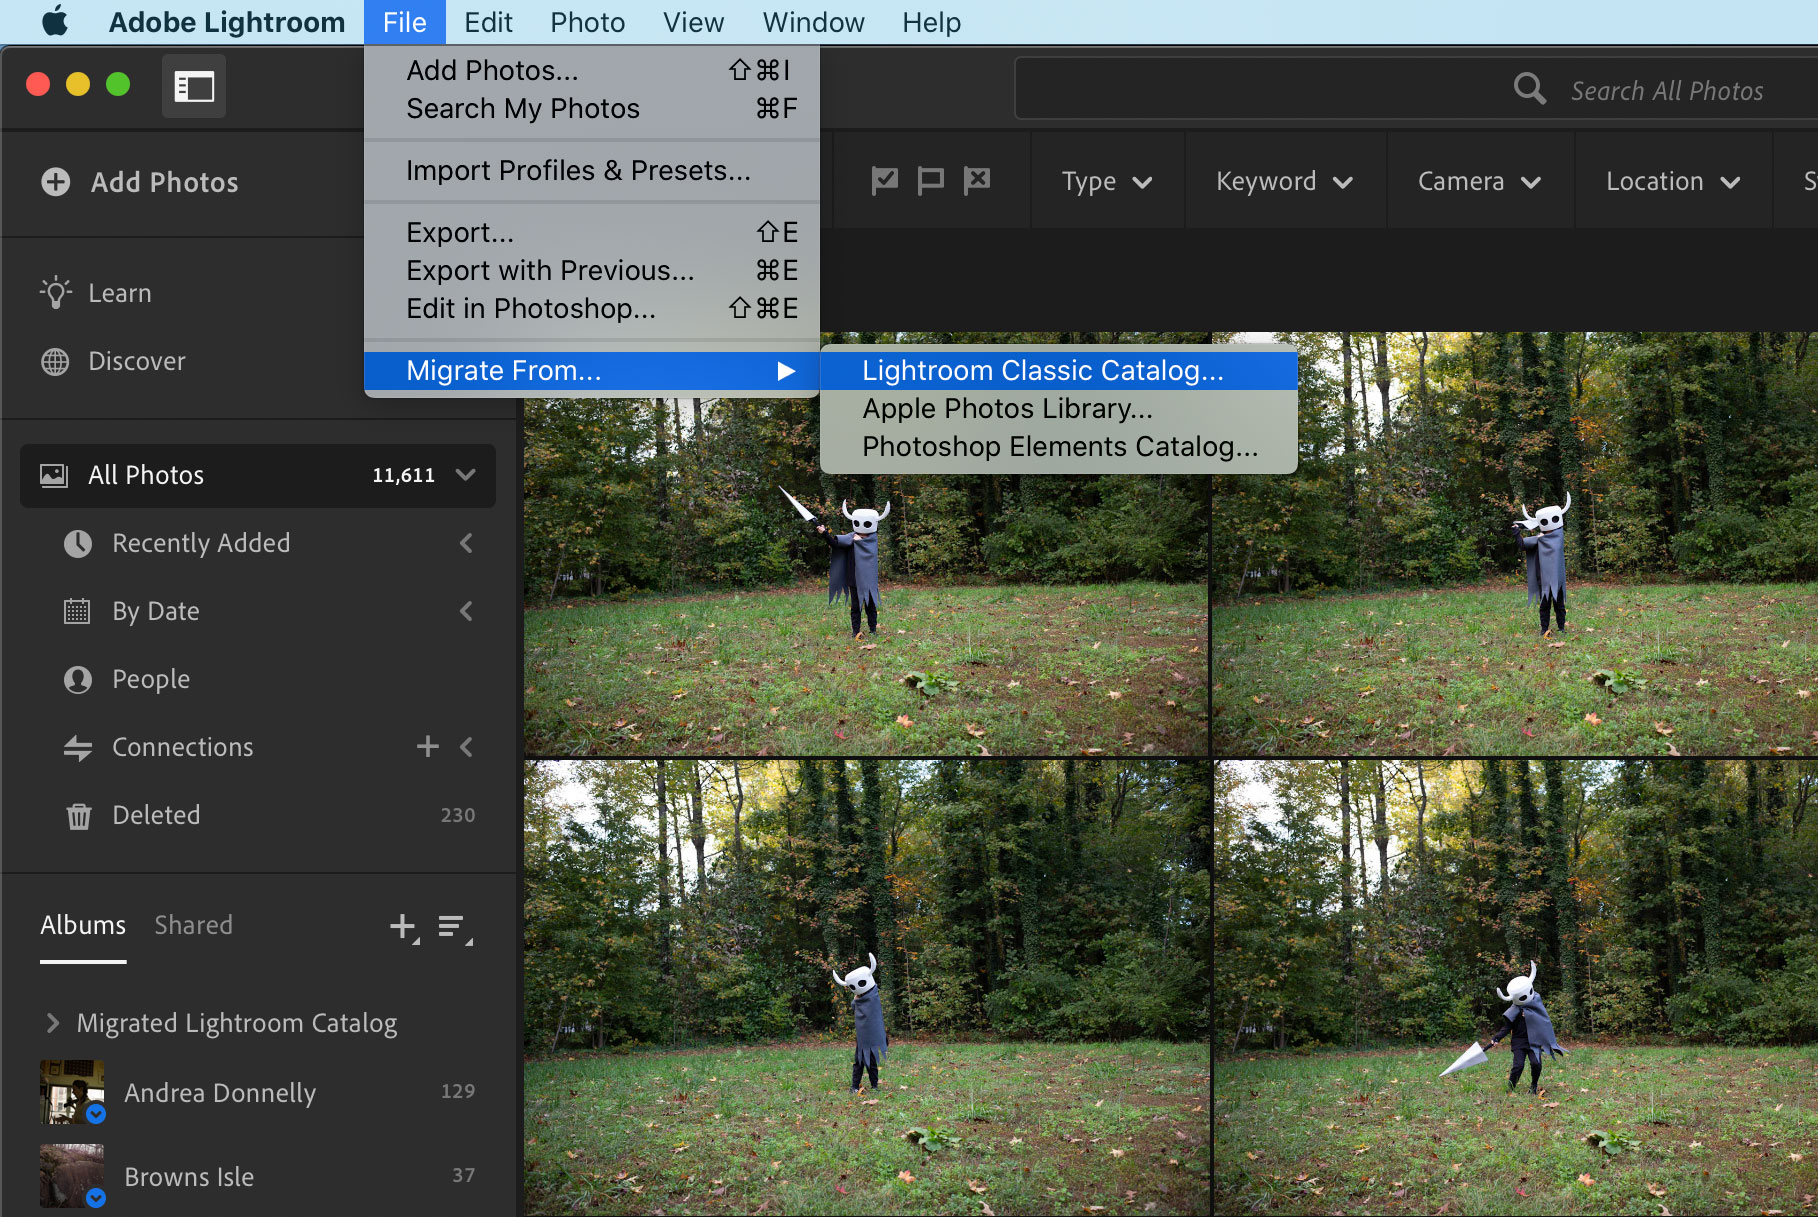
The Jump
First things first, I verified (and reverified) that I had a local backup and a remote backup of my Lightroom catalog and then ran the Lightroom Catalog Migration tool.
I had roughly 12,000 DNGs and JPGs to move and it took … a long, long time. Luckily it was late at night so after I went to bed and woke up the job was done. To Adobe’s credit the tool worked flawlessly and kept a great log of the process from start to finish. They also dropped a ‘Migrated Lightroom Catalog’ Album in Lightroom that kept a record of the ported photos.
Next, I exported my presets from LrC, and imported them into Lightroom. You might be able to do it using an iOS device and the Files app, but I recommend using a Mac.
That’s was it!
Backup
While I’m sure Adobe has plans for Lightroom into the foreseeable future, I do not trust them. You shouldn’t either. To that end, you need to have a robust back up to rely on if Lightroom dies or something else comes along to replace it. I recommend the following:
- A NAS. I have a Synology NAS set up with RAID 5 that has every frame I’ve ever shot with a real camera running on my local network (I don’t mix phone photos and camera photos).
- An always-on Mac. The iMac I use is a few years old, and while Lightroom feels slower on the Mac, it’s available (and has a few features that the iOS app does not).
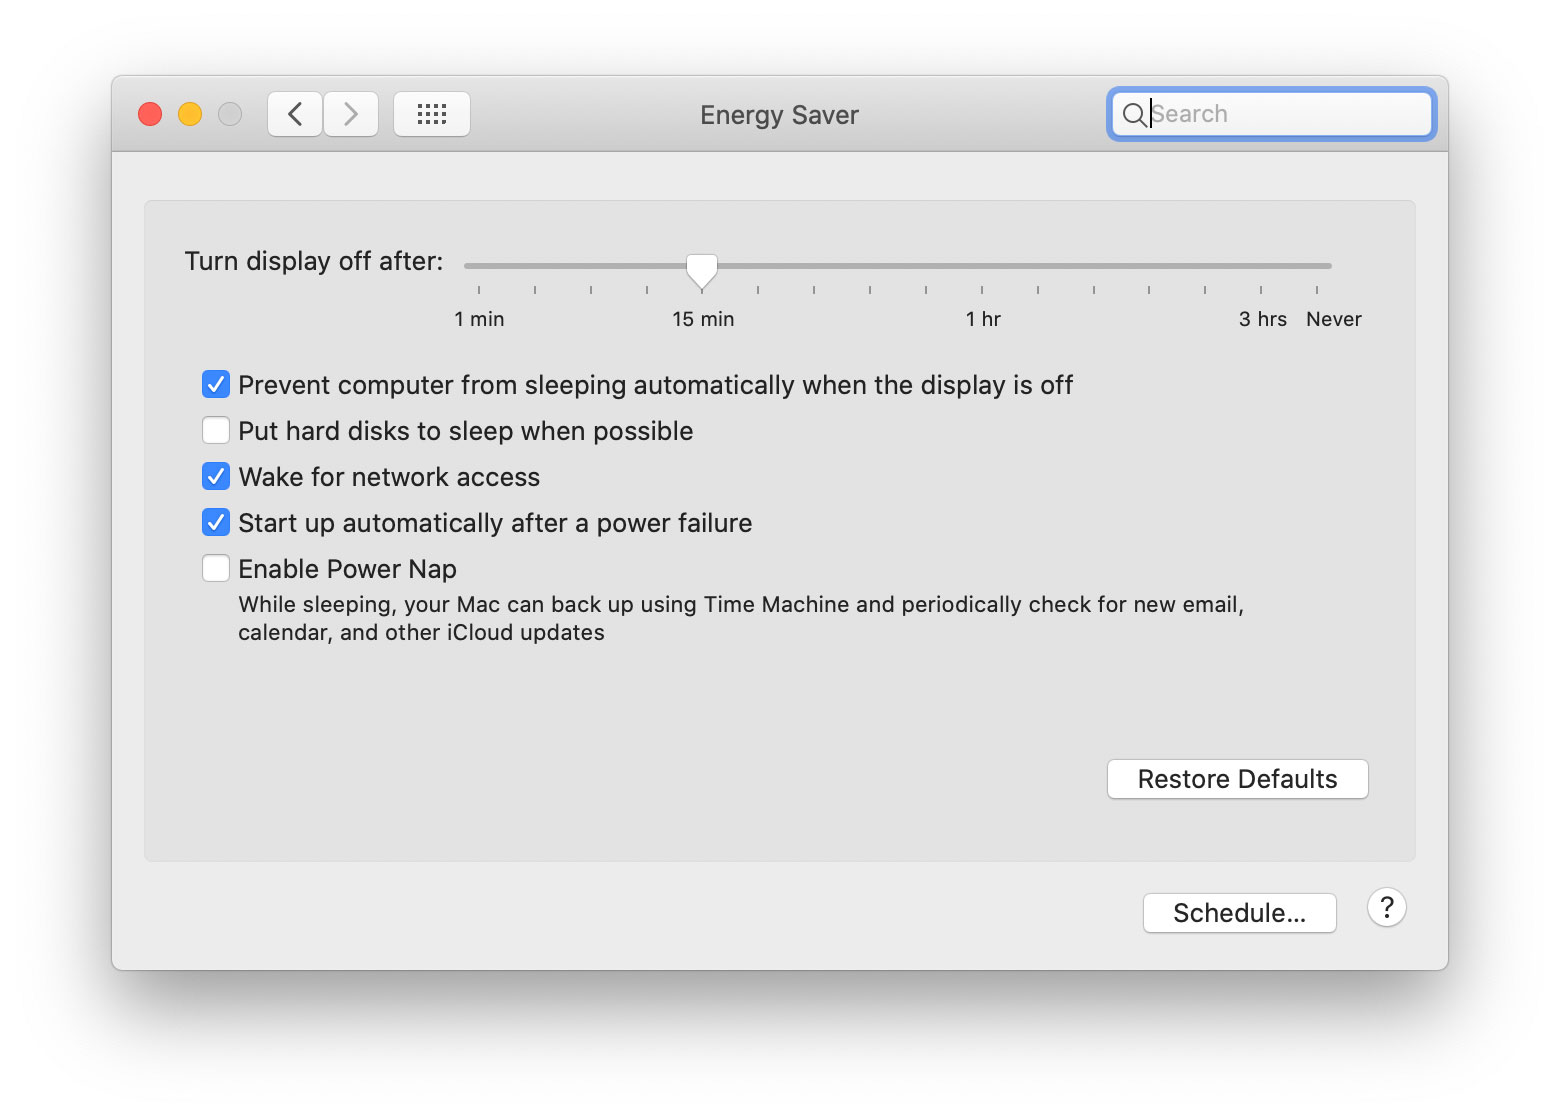
Got your gear? You’ll need to set your NAS share drive that will be used to back up your photos to always be connected. System Preferences > Users & Groups > Login Items. Click ‘+’ and then select the share. You should also make sure your Mac never sleeps:
With that set up, head to Lightroom > Preferences > Local Storage. There you need to browse to your NAS share of choice and select it:
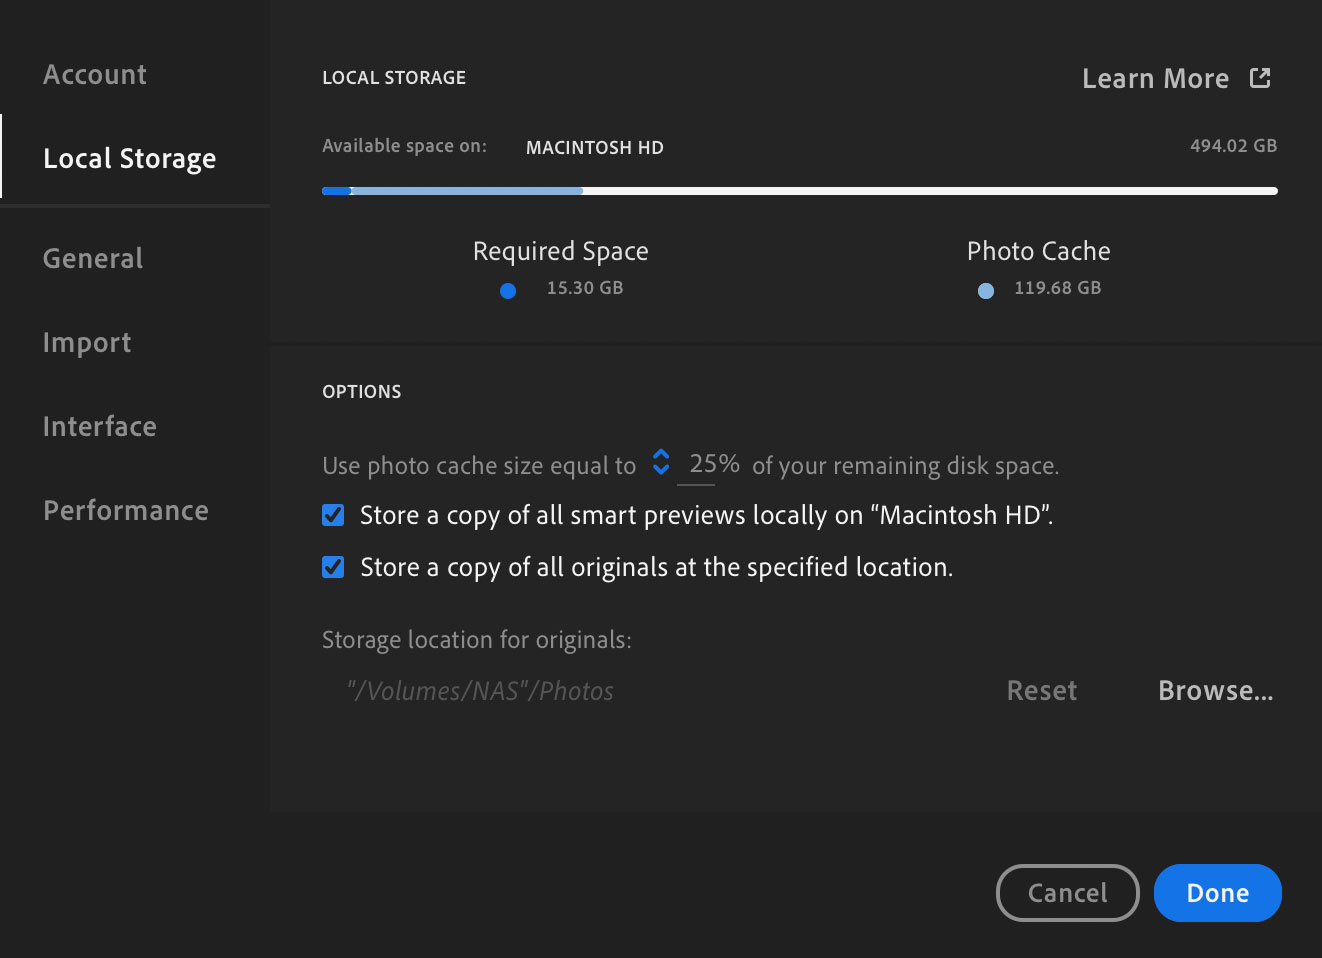
Now, every photo that gets added to Adobe cloud storage will be redundantly added to your NAS for safe keeping. And if you’re paranoid like me, you’ll also make sure that your NAS is backed up as well. I back mine up with the Synology Glacier app (free) and associated AWS Glacier plan (definitely not free).
My Workflow
On to the fun part. My iPad Pro is the workhorse of the bunch, and is where I do 90% of my importing, and editing, sorting, and exporting. It’s fast and makes editing kind of fun if you can believe it. But first things first: let’s get photos from your camera to your iPad.
Import
I shoot on a camera that uses SD Cards, so I import using the Apple USB-C to SD Card Reader. You can choose the mounted card right in Files app and select the photos you want to import. Apple makes a Lightning to SD Card Reader as well if you want to use your iPhone. If your camera supports WiFi, you’ll probably need to use whatever horrible app your camera manufacturer made for you to transport them into Photos.app to use as an intermediary. I strongly recommend against doing this; it creates extra steps for deletion and management and kicks off a non-avoidable iCloud sync that will leave you confused and frustrated. Once your photos are imported, you’re ready to go.
Sort
The first thing I do is sort out the trash. Select the Rate & Review tab and swipe left and right through your photos. When you hit one that you want to delete, swipe down to mark it as rejected.
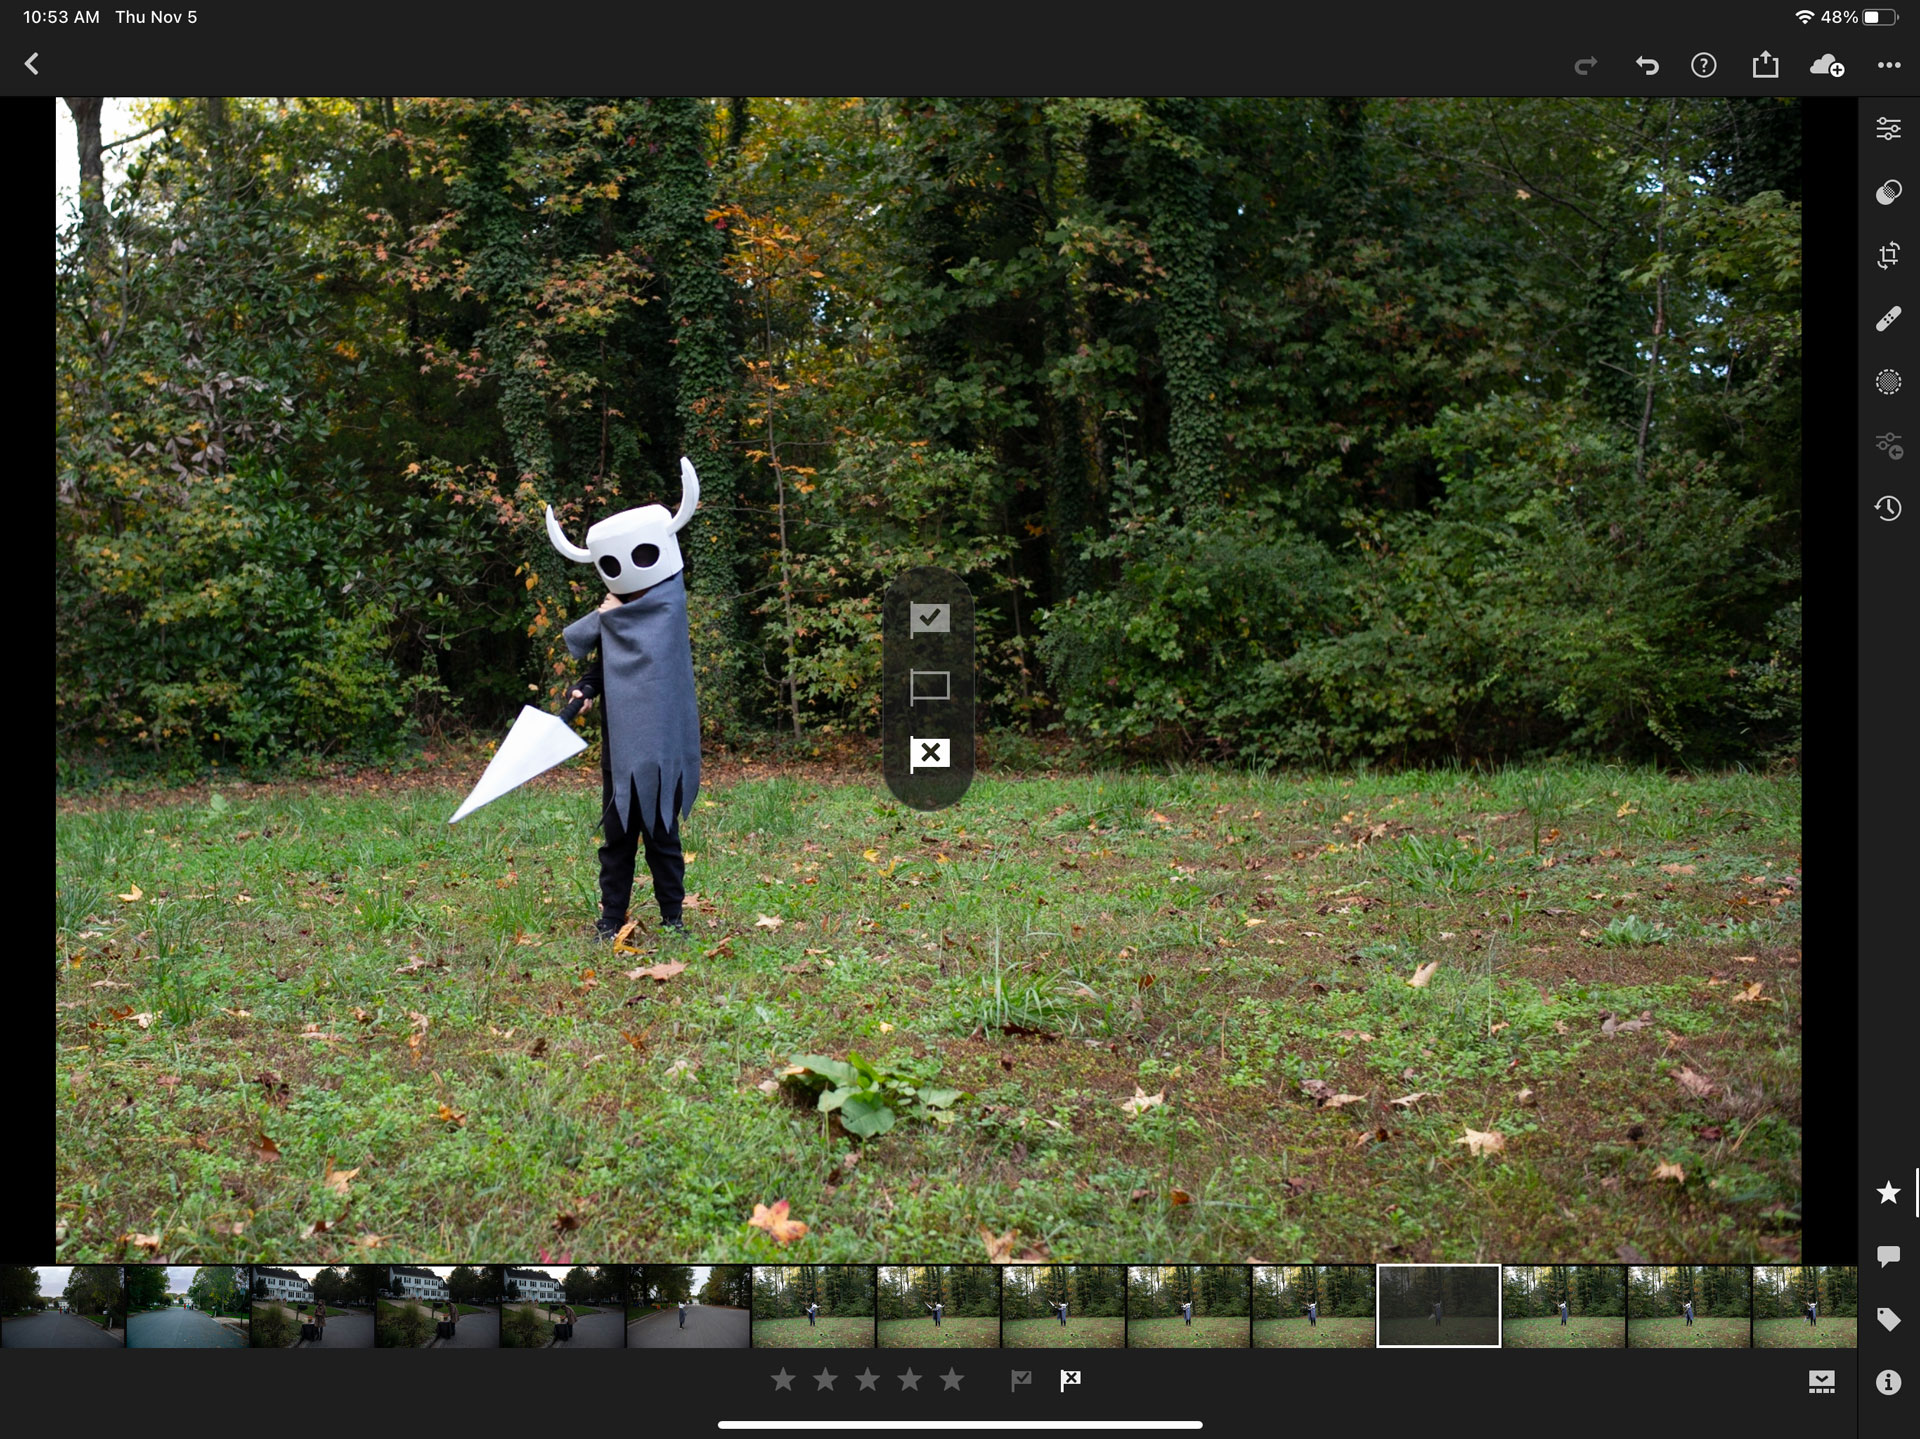
I typically take two passes through each ‘event’ that I capture before I have it honed down to the shots that I want to keep. Once you’re happy, filter to your rejects, select all, and delete.

Alternately, you could flag photos as accepted by swiping up, but I use that flag to indicate my favorite photos of all time. And if you’re a star-rater, have fun and bless your heart.
Edit
The RAW editing engine in iOS Lightroom is excellent. It’s lightning fast and the UX is great. I won’t go into my editing workflow since everyone has their own way, but you should have no issues getting used to the controls if you’ve ever used image editing software before.
Export
While nowhere near as robust as LrC, Lightroom export is fine. You can choose a preset and even watermark if you’re into that. They support web publishing (previously its own tab in LrC), which is great for showing family and friends your photos without needing to worry about what platform they use.
Shortfalls
Here’s a few things to be aware of before you take the plunge:
- No catalog support. This is a major failing of Adobe’s Lightroom strategy. They seem to have forgotten that the original intent of Lightroom was to aid pro photographers with not only editing, but organization. I believe this keeps most serious photographers that work with clients from taking Lightroom seriously. I hope that they get in gear and solve this problem, or they’re leaving themselves open to competition coming in and taking that ceded ground.
- No virtual copies. Virtual copies allowed you to make a copy of a photo and experiment with a different look while being able to see it right next to the original in the grid (without taking up additional space on disk). In Lightroom on the Mac you can right click and make a duplicate, but it’s just that. It isn’t tied to the original and takes up as much room on disk as the original does. On iOS and iPadOS, you can’t duplicate at all for some reason. Adobe seems to be pushing users toward a new feature named Versions; photo states that you can manage in a tab. I don’t love it, but at least you can play around with a photo without making a dumb copy and taking up extra space.
- No book or print features. Physical media support is gone and probably never coming back. There are plenty of better ways to do this, so I’m not surprised and it’s probably for the best.
- No slideshows. I know a lot of people that used this feature, but again, there’s many other ways of doing this and I doubt it will ever come back.
Final Verdict
No software is perfect, but Lightroom is finally ready to jump into for most users. If you aren’t shooting client work, frustrated with built-in photo library apps, and have an end-to-end digital workflow and delivery, Lightroom is as good as it gets.